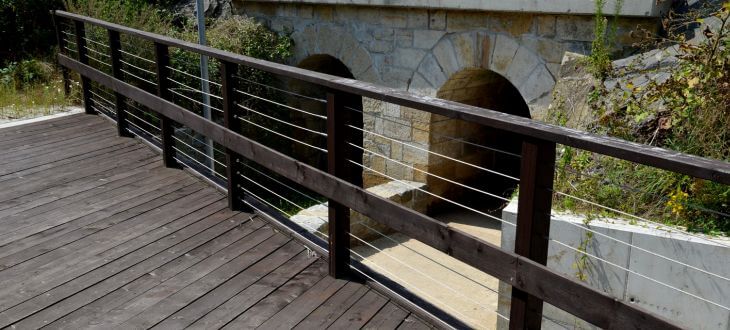
Cable railings have become popular in modern architecture, offering a sleek and minimalist aesthetic while maintaining safety and functionality. In this blog post, we will walk you through the step-by-step process of installing cable railing, providing comprehensive instructions to ensure a successful and visually stunning result.
Understanding Cable Railing
Before starting the installation process, it’s essential to grasp the basics of cable railing. Unlike traditional railings with vertical or horizontal balusters, cable railings use stainless steel cables to provide an open, unobstructed view. This design enhances a space’s visual appeal while improving airflow and natural light penetration.
What You Need to Install Cable Railing
The following are some materials you’ll need:
- Stainless Steel Cables: Ensure they are of the appropriate length and thickness for your project.
- Cable End Fittings: Including terminal fittings, turnbuckles, and tensioners.
- Cable Railing Posts: Choose sturdy and corrosion-resistant posts for proper support.
- Drill with Appropriate Bits: This makes holes in posts and secures fittings.
- Wrenches and Screwdrivers: To tighten and secure cable fittings.
- Level: Essential for ensuring the straightness and alignment of the railing.
Cable Rail Installation Instructions
Step 1. Measure and Plan
Accurate measurements and careful planning are crucial for a successful cable railing installation. Determine the layout and spacing of the posts, ensuring compliance with local building codes. Measure the distance between each post and calculate the number of cables needed.
Step 2. Install Railing Posts
Install sturdy, corrosion-resistant railing posts at the designated locations. Use a level to ensure that each post is plumb and properly aligned. Secure the posts using appropriate anchors or mounting hardware, depending on the surface type (e.g., wood, concrete).
Step 3. Mark and Drill Holes
Mark the locations for the cable holes on each post according to your design and spacing. Use a drill with the appropriate bit size to make clean and precise holes. Ensure the holes are level and aligned across all posts to achieve a professional-looking finish.
Step 4. Insert and Secure Cable Fittings
Thread the stainless steel cables through the drilled holes, starting at one end and working to the other. Attach terminal fittings at each end of the wires, securing them tightly with wrenches. Use turnbuckles and tensioners to achieve the desired cable tension, ensuring a taut and secure railing.
Step 5. Trim Excess Cable
Once securely attached and tensioned, use a cable cutter to trim any excess length. Be precise with the cuts to maintain a neat and polished appearance. Ensure that all cut ends are adequately capped or crimped to prevent fraying.
Step 6. Final Tensioning and Alignment
Double-check the tension of each cable and make any necessary adjustments with turnbuckles or tensioners. Use a level to ensure that the entire railing is straight and aligned. Proper tension and alignment are critical for the cable railing’s structural integrity and aesthetic appeal.
Step 7. (Optional) Add Decorative Elements
Consider adding decorative elements such as post caps or railings to enhance the visual appeal of your cable railing. These finishing touches complement the overall design and give the completed installation a polished look.
Step 8. Perform Safety Checks
Before considering the installation complete, perform thorough safety checks. Ensure all cables are correctly tensioned, securely attached, and in compliance with local building codes. A safe and well-installed cable railing is visually appealing and a reliable barrier for elevated spaces.
Installing cable railing is a rewarding project that can transform the look and feel of any space. Following the step-by-step guide outlined above, you can confidently embark on this endeavor to create a modern and visually striking railing that seamlessly combines form and function.
Cable railing adds a contemporary touch to your surroundings and offers durability and low maintenance. As you revel in the beauty of your newly installed cable railing, you’ll appreciate the unobstructed views and open ambiance it brings to your living spaces. Whether it’s a deck, balcony, or staircase, cable railing is a testament to modern design and architectural innovation.
Visit Tampa Steel & Supply for Quality Metal and Metal Processing Services
Do you need help with metalworking and keeping your metal fresh? The experienced professionals at Tampa Steel & Supply are here to help. We provide the highest-quality services to our customers.
Request a Quote Online
Or Call Tampa Steel & Supply at (813) 241-2801

