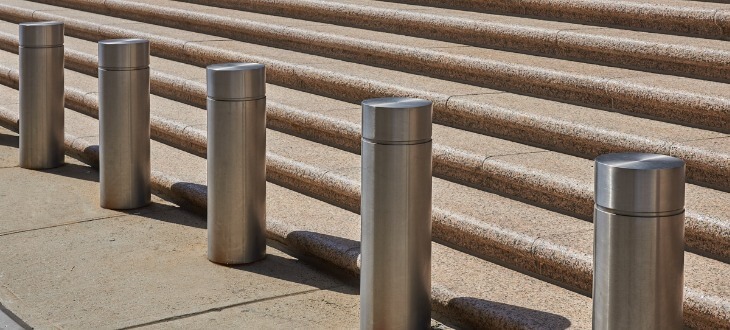
Bollards are essential in many urban, suburban, and even rural environments, providing security, traffic control, and aesthetic appeal. From protecting storefronts to delineating pedestrian zones, bollards serve both functional and decorative purposes. Because bollards are frequently used as traffic control devices, installing bollards in asphalt is a common project.
When installing bollards on asphalt surfaces, specific techniques and tools are required to ensure a secure, durable installation. If you’re looking for guidance in this area, our comprehensive guide walks you through installing bollards in asphalt, covering everything from preparation to final inspection.
What Are Bollards and Why Are They Important?
Bollards are sturdy posts that can be installed in different surfaces to control traffic flow, protect buildings and pedestrians, and secure perimeters. They come in various styles, materials, and sizes, depending on their intended use. Common types of bollards include fixed, removable, retractable, and decorative bollards. While some bollards are purely functional, others enhance a space’s aesthetic appeal.
Installing bollards in asphalt presents unique challenges compared to installing them in concrete. Asphalt is a flexible material that can shift over time due to temperature changes and heavy loads, making it essential to follow proper installation methods to ensure the bollards remain secure.
Types of Asphalt and Their Characteristics
Before diving into the necessary steps for knowing how to install bollards in asphalt, it’s important to understand the different types of asphalt you may encounter. Common asphalt mixtures include:
- Hot Mix Asphalt (HMA): The most common type of asphalt, known for its durability and strength. It is typically used for roads, parking lots, and driveways.
- Warm Mix Asphalt (WMA): Similar to HMA but produced at lower temperatures, which can be beneficial for certain environmental conditions.
- Cold Mix Asphalt (CMA): Often used for temporary repairs or in low-traffic areas. It is not as durable as HMA or WMA.
Understanding the type of asphalt in your installation area is crucial, as it can influence the method and materials used for installing bollards in asphalt.
Tools and Materials Needed for Installing Bollards in Asphalt
To successfully install bollards in asphalt, you’ll need the following tools and materials:
- Bollards, fixed, removable, or decorative
- Drill with a core bit that is appropriate for asphalt
- Concrete mix
- Rebar or anchor rods
- Shovel
- Measuring tape
- Level
- Safety gear, including gloves and goggles
Having the right tools and materials on hand will make the process more efficient and ensure a secure installation.
Step-by-Step Guide: How to Install Bollards in Asphalt
Installing bollards in asphalt involves several key steps to ensure a stable, durable result. Specific steps may vary depending on the type of bollard being installed. Below is a detailed breakdown of each step to help you achieve a successful installation.
Step 1: Site Preparation
Before starting the installation, it’s crucial to prepare the site and inspect it to ensure there are no underground utilities. Identify the location where the bollards will be installed and mark the spots clearly. Make sure the bollards are evenly spaced and close enough together to fully control traffic or secure the area. Ensure that the installation points are free from debris and that the asphalt surface is clean and dry.
Step 2: Core Drilling
Core drilling is the process of creating a hole in the asphalt surface to accommodate the bollard. Use a drill with a core bit specifically designed for asphalt. The hole should be slightly larger than the bollard’s diameter to allow for secure placement. The hole depth should be 18-24 inches, depending on the bollard’s specifications and the required level of security.
Step 3: Reinforcement
Depending on the type of bollard, it can be beneficial to insert rebar or anchor rods into the hole before placing the bollard. This reinforcement helps prevent the bollard from shifting over time, especially in high-traffic areas.
Step 4: Installing the Bollard
For fixed bollards, place the bollard into the drilled hole, ensuring it is level and positioned correctly. If the bollard is not level, adjust it before proceeding. Removable or collapsible bollards may require insertion of a mounting sleeve or footing, per manufacturer instructions. Use a level to verify the bollard’s alignment.
Step 5: Filling the Hole with Concrete
Once the bollard is positioned correctly, fill the hole with concrete to secure it in place. Pour the concrete carefully to avoid air pockets and ensure a smooth, even fill. Allow the concrete to set according to the manufacturer’s instructions. In areas with heavy vehicle traffic, consider using a high-strength concrete mix for added durability.
Step 6: Finishing Touches
After the concrete has set and fully cured, check the bollard’s stability. Remove any excess concrete or debris around the base. If the bollard is decorative, you can add paint or a cover. For enhanced safety and visibility, you can also add reflective tape.
Best Practices for Installing Bollards in Asphalt
- Choose the Right Bollard Type: Ensure that the bollard you select is suitable for asphalt installation and matches your security needs.
- Use Quality Materials: High-quality concrete and reinforcement materials will ensure a longer-lasting installation.
- Follow Local Regulations: Some jurisdictions have specific requirements for bollard installations. Make sure you are compliant with local building codes.
- Consider Environmental Factors: Asphalt surfaces can shift due to weather changes. Regular inspections and maintenance are essential to ensure the bollards remain secure.
Common Mistakes to Avoid When Installing Bollards in Asphalt
- Shallow Drilling: Failing to drill deep enough can result in an unstable bollard that may shift or tip over.
- Skipping Reinforcement: While not always mandatory, reinforcement significantly improves the bollard’s stability and longevity.
- Improper Concrete Use: Using the wrong type of concrete or not allowing it to set properly can compromise the installation.
- Ignoring Maintenance: Regular maintenance is essential to ensure that the bollards remain effective over time.
How to Install Bollards in Asphalt — Ensuring Success
Installing bollards in asphalt requires careful planning, the right tools, and proper techniques to ensure a secure and durable installation. The steps in this guide can help you get started learning how to install bollards in asphalt. Remember to choose the appropriate bollard type, use high-quality materials, and follow best practices to achieve a professional, lasting result. Whether you are securing a parking lot, protecting a storefront, or enhancing pedestrian safety, a properly installed bollard will serve its purpose for years to come.
Tampa Steel & Supply stocks an extensive inventory of pre-cut steel pipe bollards, including popular sizes of 4″ and 6″ diameter and 6′ to 7′ in length to accommodate standard installation methods and local codes. We also have decorative pipe bollard sleeves and other sized bollards in materials such as steel, stainless steel, and aluminum.
Visit Tampa Steel & Supply for Quality Metal and Metal Processing Services
Do you need help with metalworking and keeping your metal fresh? The experienced professionals at Tampa Steel & Supply are here to help. We provide the highest-quality services to our customers.
Request a quote online or call Tampa Steel & Supply at (813) 241-2801.