
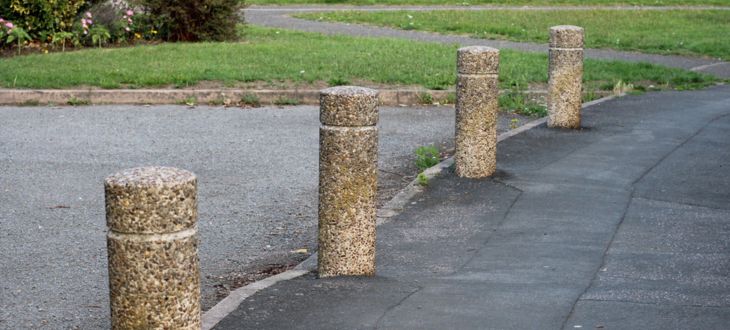
What Are Bollards and Why Do They Matter?
A bollard is a short, sturdy vertical post, typically made from steel, that’s installed in the ground to control or block vehicle traffic. You’ll see them outside gas stations, retail entrances, loading docks, and warehouses throughout Florida. Their main job is simple: keep vehicles away from structures, equipment, utility lines, and people.
Bollards matter for a few key reasons:
- Property protection. A single vehicle collision with a gas line, HVAC unit, or building corner can cost thousands of dollars in repairs. Bollards absorb that impact instead.
- Safety compliance. Many commercial properties are required to install bollards near pedestrian walkways or accessible entrances to meet local safety codes.
- Liability reduction. Clearly marked, well-installed bollards reduce the risk of accidents and the legal exposure that follows them.
- Curb appeal. Modern steel bollards, especially when paired with reflective sleeves or powder coating, can look sharp instead of purely industrial.
Whether you’re protecting a storefront in Tampa or securing a loading area in Brandon, the function is the same: a properly installed bollard stands up to real impact because it’s anchored deep and solid in concrete. For a closer look at fixed, removable, and decorative options, check out our guide to different types of bollards and their uses.
Before You Dig: Gather Your Materials & Tools
Having the right supplies on hand before starting your bollard installation will save you unnecessary trips and keep your project running on schedule.
Materials Needed
- Steel Pipe or Bollard Post: Most structural installations use 4-inch or 6-inch Schedule 40 or Schedule 80 steel pipe. Pro Tip: Order pre-cut custom lengths to eliminate time-consuming on-site cutting.
- Custom Caps or Sleeves: Protect the pipe interior and add a clean, finished look with protective sleeves or CNC plasma-cut custom tops.
- Structural Concrete Mix: High-strength, ready-mix concrete rated for structural support.
- Base Aggregate: Gravel or crushed stone to ensure proper water drainage beneath the post base.
- Finishing & Safety Coatings: Rust-resistant primer and outdoor paint (or a powder-coated finish), plus high-visibility reflective tape or safety yellow paint.
Tools Required
- Post Hole Digger or Auger: Gas-powered or manual, depending on soil density and depth requirements.
- Pipe Cutter or Circular Saw: (Only required if you aren’t using custom pre-cut steel pipe).
- Measuring & Alignment: Tape measure, post level, and a string line with stakes to align multiple bollards evenly.
- Mixing & Placement: Wheelbarrow (or mixing tub) and a sturdy shovel.
- Safety Gear: Heavy-duty work gloves and eye protection.
Sourcing quality steel pipe matters here. A bollard is only as strong as the material it’s made from, so choosing properly rated steel from a trusted supplier ensures the post can absorb impact without buckling. Not sure if the investment is worth it? Our breakdown of pipe bollard benefits covers the safety, security, and cost advantages in more detail.
Step by Step: Installing Bollards in Concrete
Step 1: Plan Your Layout
Decide exactly where each bollard needs to go. Measure spacing evenly, typically 3 to 5 feet apart for vehicle barriers, and mark each location with spray paint or a stake. Call 811 before you dig, since Florida law requires it and it protects you from hitting underground utility lines. Visit Sunshine 811 to submit a locate request online.
Step 2: Dig the Holes
Dig each hole to a minimum depth of 24 to 36 inches, depending on the height and impact rating you need. A general rule of thumb is that one-third to one-half of the total bollard length should be below grade. The hole diameter should be roughly three times the width of the post to allow enough concrete around it for strength.
Step 3: Add a Gravel Base
Pour 3 to 4 inches of gravel into the bottom of each hole. This improves drainage and helps prevent water from pooling around the base of the steel post, which reduces long-term corrosion.
Step 4: Set the Post
Place the steel pipe into the hole, centered and plumb. Use a level to check it from two directions, and brace it temporarily with wood stakes or a support frame so it doesn’t shift while the concrete cures.
Step 5: Pour the Concrete
Mix your concrete according to the manufacturer’s directions and pour it into the hole around the post. Work it with a shovel or rod to remove air pockets, and slope the top of the concrete slightly away from the post so water drains away from the steel rather than sitting against it.
Step 6: Check Alignment Again
Before the concrete sets, recheck that the post is level and at the correct height. This is your last chance to make adjustments, since steel set crooked in cured concrete is very difficult to fix.
Step 7: Let It Cure
Allow the concrete to cure for at least 48 to 72 hours before removing bracing, and a full 7 days before the bollard takes any real impact. Curing times can vary with Florida’s heat and humidity, so check your concrete mix’s specific guidance.
Step 8: Finish & Protect Against Coastal Corrosion
Once the concrete has fully cured, it’s time to protect your exposed steel. In the Tampa and Hillsborough County area, high humidity, salt-laden air, and direct coastal exposure accelerate rust far faster than in inland climates.
- Marine-Grade Primer & Paint: Apply a heavy-duty, rust-inhibiting primer followed by outdoor-rated UV- and moisture-resistant paint. Safety yellow is the industry standard for commercial parking areas and driveways.
- Powder Coating: For maximum durability against Florida’s salt air and sun, opt for a high-performance powder-coated finish.
- Caps & Sleeves: Cover the post top with a CNC plasma-cut custom cap or heavy-duty bollard sleeve to prevent standing water from pooling inside the pipe, adding both UV protection and a polished look.
Final Thoughts
Installing bollards in concrete is a manageable weekend project for most DIYers, as long as you plan the layout, use the right materials, and give the concrete proper time to cure. For Tampa Bay properties dealing with heat, humidity, and heavy vehicle traffic, quality steel pipe and a solid concrete footing make the difference between a bollard that lasts for decades and one that fails on first impact.
If you’re sourcing steel pipe for your next bollard project, Tampa Steel & Supply carries the schedule 40 and schedule 80 pipe sizes commonly used for commercial and residential installations, along with cutting services if you need custom lengths. Want to see how these pipes hold up in the ground? Read more on how steel pipe bollards work.
For additional guidance on ADA-compliant bollard placement near accessible routes, the ADA National Network offers detailed technical resources.