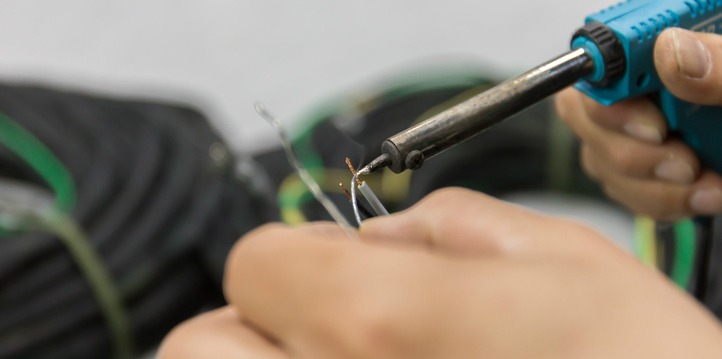
The majority of us have experienced the pain of burning our hands or fingers at least once. Knowing the pain associated with burnt skin makes soldering seem even more dangerous and scary! But with the right tools and equipment, soldering can be made easy and safe for all beginners. Here’s a guide on how to set yourself up for success in soldering.
How to Solder in 5 Steps
Materials
- Soldering Torch
- Flux and brush
- Solder
- Shears
- Heatproof Surface
- Reverse Action Tweezers
- Precision and Plastic Tweezers
- Steel Plate
- Pickle
- Brass brush or pumice powder
Directions
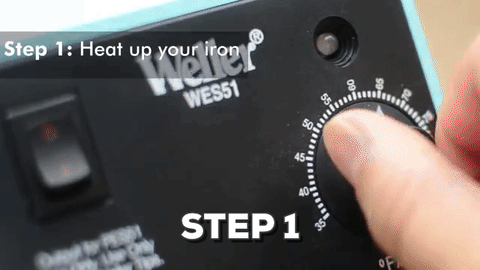
Step 1. Heat up your iron
Heat up your iron to about 600-700 degrees Fahrenheit.
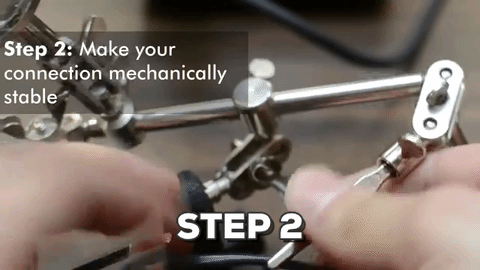
Step 2. Stabilize
Stabilize your connection using your reverse action tweezers.
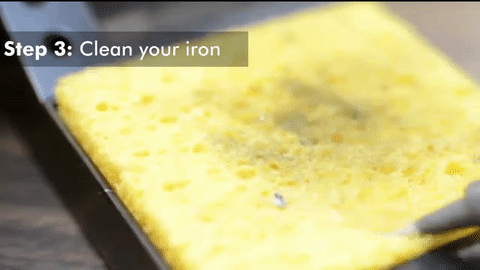
Step 3. Clean your iron
Clean your solder and metals using your pickle solution and brush to ensure that dirty oxide layers are gone and then apply flux to seal the surface for the solder to run. Your shears will trim your solder strip so that you have as much as you need.
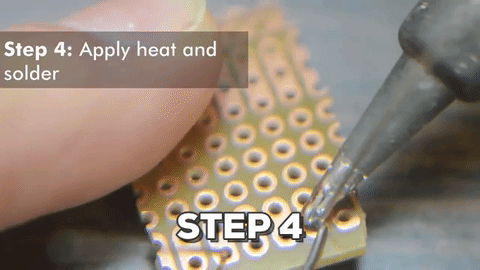
Step 4. Apply heat and solder
On a heatproof surface, using a soldering torch apply heat to solder material to join the metals. You may need to use precision tweezers to position pieces of solder.
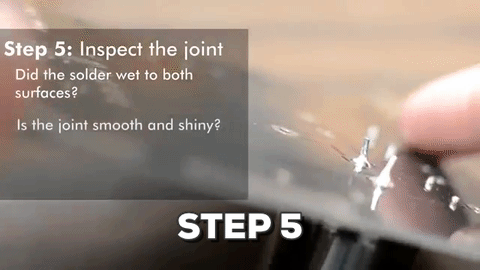
Step 5. Inspect the joint
Inspect your connection to make sure there is enough solder holding the pieces together. Trim any leads of solder using your shears and then your piece is ready to be cleaned and polished using a brass brush or pumice powder!
Contact Tampa Steel & Supply
When your soldering projects grow past beginner stages, contact one of the professionals at Tampa Steel & Supply and we’ll be sure to help with all the big projects you have in mind.
Request a Quote Online
Or Call Tampa Steel & Supply at (813) 241-2801