When painting metal, preparation is crucial to achieving a long-lasting, high-quality finish. This preparation often involves using a primer, but many wonder if it’s essential. This blog post explores what primer is, why it’s crucial for metal surfaces, and the consequences of skipping this step.
What is Primer Used For?
Primer is a specially formulated paint product designed to create a robust and adhesive base layer on surfaces before applying the final coat of paint. It serves several essential functions:
- Adhesion: Primer helps paint adhere better to the surface, ensuring a more durable and even finish.
- Corrosion Resistance: Primer can provide a protective barrier that prevents rust and corrosion of metals.
- Surface Smoothing: Primer can fill in minor imperfections on the surface, creating a smoother canvas for painting.
- Color Base: It provides a neutral base that enhances the actual color of the topcoat.
Types of Primers for Metal
There are various primers available, each suited to different types of metal and conditions:
- Rust-Inhibitive Primers: These contain anti-corrosive pigments that prevent rust on ferrous metals.
- Epoxy Primers: Known for their strong adhesion and chemical resistance, they are ideal for industrial applications.
- Etching Primers: Contain acidic elements that etch the metal surface, enhancing paint adhesion. They are handy for non-ferrous metals like aluminum and galvanized steel.
- Acrylic Primers: Water-based and quick-drying, suitable for interior metal surfaces with minimal exposure to harsh conditions.
Why is it Important to Use a Primer Coat When Painting Metals?
Primer serves two primary purposes when it comes to metal. First, it acts as a bonding agent that allows the paint to better adhere to metal. Primer contains extenders, which are solid components used to add weight to the solution. In addition to increasing the adhesive bond between metal and paint, the extenders in primer also give the paint an extra durability boost.
The primer’s second responsibility is increasing the metal’s resistance to corrosion. Primers contain several components that are effective in cleaning, sealing, and protecting metal. The coating increases the metal’s passivity, which makes it more resistant to corrosion-causing agents in the environment, such as rain, humidity, and salt.
What Happens if You Don’t Use Primer?
Poor Adhesion
Skipping primer can result in poor paint adhesion, leading to peeling, flaking, and chipping over time. This affects the appearance of the painted metal and reduces its durability and lifespan. The paint may only stick appropriately with primer, especially on smooth, shiny surfaces like aluminum or stainless steel.
Increased Corrosion Risk
Metal is more vulnerable to rust and corrosion without a protective primer layer. Once corrosion starts, it can spread quickly, causing significant damage that can compromise the structural integrity of the metal. This is particularly concerning for outdoor applications or areas exposed to moisture and salt, such as coastal regions.
Uneven Finish
A lack of primer can lead to an uneven paint finish, with visible brush strokes, roller marks, or spray inconsistencies. The paint may need to cover imperfections, resulting in a less professional appearance adequately. Additionally, the color of the topcoat may appear differently than intended, as the underlying metal can affect its hue and coverage.
How To Prepare and Prime Metal in 4 Steps
Step 1: Surface Preparation
- Clean the Metal: Remove all dirt, grease, and grime using a degreaser or a mixture of mild detergent and water. Rinse thoroughly and let it dry completely.
- Remove Old Paint and Rust: If the metal has been previously painted, use a paint scraper or chemical paint remover to strip away old paint. Sand down rust spots with sandpaper or use a wire brush to remove loose rust and corrosion.
- Sand the Surface: Use medium-grit sandpaper (around 120-grit) to sand the entire surface. This roughens up the metal, helping the primer adhere better. Wipe away any dust with a clean, dry cloth.
Step 2: Applying Primer
- Choose the Right Primer: Select a primer suitable for the type of metal and the conditions it will be exposed to. For instance, use a rust-inhibitive primer for outdoor metal surfaces.
- Apply the Primer: Primer can be applied using various methods:
- Spray Can: Convenient for small projects and hard-to-reach areas.
- Spray Gun: Provides a smooth, even coat, ideal for larger projects.
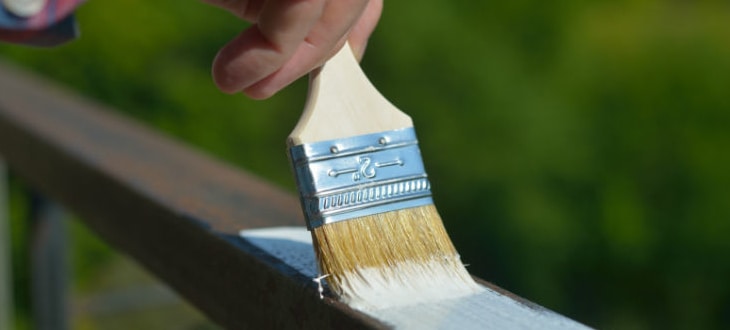
- Brush: Useful for detail work or small surfaces, though it may leave brush marks.
- Roller: Efficient for flat, broad surfaces, ensuring even coverage.
Follow the manufacturer’s instructions regarding application technique and drying times. Typically, a single coat of primer is sufficient, but some surfaces may benefit from a second coat for extra protection.
- Drying Time: The primer can dry according to the product’s instructions. This usually takes a few hours, but some primers may require overnight drying.
Step 3: Inspecting and Sanding
- Inspect the Primed Surface: Check for missed spots, drips, or uneven areas. If necessary, lightly sand the surface with fine-grit sandpaper (220-grit) to smooth out imperfections.
- Clean the Surface Again: Wipe away any sanding dust with a clean, dry cloth. Ensure the surface is free of debris before applying the topcoat.
Step 4: Applying the Topcoat
- Choose Your Paint: Select a paint suitable for metal surfaces. For outdoor projects, opt for a durable, weather-resistant paint.
- Apply the Paint: Using the same methods as the primer, apply the topcoat in thin, even layers. Multiple thin coats are preferable to one thick coat, which helps prevent drips and ensures a smoother finish.
- Drying Time: Allow each coat of paint to dry completely before applying the next one. Follow the manufacturer’s instructions for drying times.
Priming metal before painting is an essential step that should not be overlooked. Primer improves paint adhesion, prevents corrosion, and creates a smooth surface for a professional finish. Skipping this step can lead to poor adhesion, increased corrosion risk, and an uneven finish, compromising the durability and appearance of your project.
You can ensure a high-quality, long-lasting paint job by following the proper steps to prep and prime your metal surfaces. Each stage is crucial to achieving the best results, from cleaning and sanding to choosing and applying the suitable primer correctly. Whether protecting outdoor metal structures from the elements or enhancing the look of metal furniture, taking the time to prime correctly will pay off in the long run.
For more information, check out our blogs:
- How to Clean Metal Before Painting
- 6 Benefits & Advantages of Painting Metals
- How to Paint Metal: Instructions & Guide
- 5 Tips for Painting Metal
Contact Tampa Steel & Supply for Primed Metal
At Tampa Steel & Supply, we offer a range of primers and paints for a variety of metal types. If you are unsure of what kind of primer to use on your metal, ask one of our professionals. Visit our website today to see a list of the products we carry and how we can help you keep your metal looking its best! Contact us today or visit our showroom to see our wide selection of metal inventory!
Request a Quote Online
Or Call Tampa Steel & Supply at (813) 241-2801